
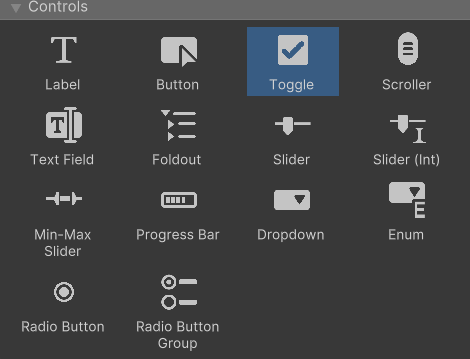
UI ToolKit을 활용하여 UI를 만들다 보면 유니티에서 제공하는 여러 에셋들을 사용하게 된다. 하지만 이 에셋들을 기본기능만 하기 때문에 어딘가 조금 밋밋한느낌이 난다.
그래서 그 에셋을 수정하려고 하면 수정할 수 없게 막혀있다. 하지만 UXML을 통해 토글을 제정의할 수 있다.

UXML (Unity Extensible Markup Language)
일단 토글을 고칠려면 막혀있을것이다. 그래서 토글을 UXML을 통해 새로운 요소를 정의 해야 된다.
그리기 위해 일단 SlideToggle이라는 풀더(정리를 위)를 만들고 그 안에 SlideToggle라는 스크립트를 만들자.

UXML
UXML(Unity Extensible Markup Language) 파일은 사용자 인터페이스의 구조를 정의하는 텍스트 파일이다.
HTML, XAML 및 XML에서 영감을 받아 만들어 UXML과 유사한 부분들이 많다.
새로운 요소 정의
UXML 파일을 사용하여 새로운 요소를 정의하기 전에 VisualElement 또는 해당 서브 클래스 중 하나에서 새로운 클래스를 파생한 후 새로운 클래스 안에 적절한 기능을 구현해야 합니다. 새로운 클래스는 반드시 기본 생성자를 구현해야 한다.
새로운 SlideToggle클래스를 파생하고 해당 기본 생성자를 구현한다.
using UnityEngine;
using UnityEngine.UIElements;

namespace MyUILibrary
{
    public class SlideToggle : BaseField<bool>
    {
        public SlideToggle() : this(null) { }

        public SlideToggle(string label) : base(label, null)
        {

        }
    }
}
UXML 파일을 읽어 프리팹처럼 사용할려면 UI 툴킷이 새로운 클래스를 인스턴스화하도록 만들려면 클래스에 대해 팩토리를 정의해야 한다.
팩토리가 특별한 작업을 할 필요가 없는 경우에는 UxmlFactoy<T>에서 팩토리를 파생할 수 있다.. 또한 팩토리 클래스는 컴포넌트 클래스 안에 배치하는 것이 좋다.
public new class UxmlFactory : UxmlFactory<SlideToggle> { }
요소에 대한 속성 정의
새로운 클래스에 대해 UXML 특성을 정의하고 해당 팩토리가 그러한 특성을 사용하도록 설정할 수 있다.
토글은 On/Off만 있으면 되기 때문에 bool함수를 주면 된다.
UxmlTraits로 오브젝트를 초기화 시키고 속성을 선언시킨다.
using UnityEngine;
using UnityEngine.UIElements;

namespace MyUILibrary
{
    public class SlideToggle : BaseField<bool>
    {
    	public new class UxmlFactory : UxmlFactory<SlideToggle, UxmlTraits> { }
        public new class UxmlTraits : BaseFieldTraits<bool, UxmlBoolAttributeDescription> { }

        public SlideToggle() : this(null) { }

        public SlideToggle(string label) : base(label, null)
        {

        }
    }
}
속성
| 속성 | 속성 값 |
| UxmlStringAttributeDescription | string |
| UxmlFloatAttributeDescription | float |
| UxmlDoubleAttributeDescription | double |
| UxmlIntAttributeDescription | int |
| UxmlLongAttributeDescription | long |
| UxmlBoolAttributeDescription | bool |
| UxmlColorAttributeDescription | color |
| UxmlEnumAttributeDescription<T> | enum |
로직 구현
이제 알고리즘을 적적한 타이밍에 오브젝트에 클래스를 추가해줘서 움직이게 하는 스크립트를 구현하면 된다.
using UnityEngine;
using UnityEngine.UIElements;

namespace MyUILibrary
{
    public class SlideToggle : BaseField<bool>
    {
        public new class UxmlFactory : UxmlFactory<SlideToggle, UxmlTraits> { }

        public new class UxmlTraits : BaseFieldTraits<bool, UxmlBoolAttributeDescription> { }

        //class
        public static readonly new string ussClassName = "slide-toggle";
        public static readonly new string inputUssClassName = "slide-toggle__input";      // 토글에서 뒷배경의 생김새를 담당하는 클래스이다.
        public static readonly string inputKnobUssClassName = "slide-toggle__input-knob"; // 토글에서 동그란 손잡이역할의 기본적인 생김새를 만들어주는 클래스이다.
        public static readonly string inputCheckedUssClassName = "slide-toggle__input--checked"; //토글이 체크되면 변화해야될 뒷배경을 담당하는 클래스

        VisualElement m_Input;
        VisualElement m_Knob;


        public SlideToggle() : this(null) { }


        public SlideToggle(string label) : base(label, null)
        {

            AddToClassList(ussClassName);

            m_Input = this.Q(className: BaseField<bool>.inputUssClassName);
            m_Input.AddToClassList(inputUssClassName);
            Add(m_Input);

            m_Knob = new();
            m_Knob.AddToClassList(inputKnobUssClassName);
            m_Input.Add(m_Knob);

            RegisterCallback<ClickEvent>(evt => OnClick(evt));

            RegisterCallback<KeyDownEvent>(evt => OnKeydownEvent(evt));
        }

        static void OnClick(ClickEvent evt)
        {
            var slideToggle = evt.currentTarget as SlideToggle;
            slideToggle.ToggleValue();

            evt.StopPropagation();
        }

        static void OnKeydownEvent(KeyDownEvent evt)
        {
            var slideToggle = evt.currentTarget as SlideToggle;

            if (slideToggle.panel?.contextType == ContextType.Player)
                return;

            if (evt.keyCode == KeyCode.KeypadEnter || evt.keyCode == KeyCode.Return || evt.keyCode == KeyCode.Space)
            {
                slideToggle.ToggleValue();
                evt.StopPropagation();
            }
        }

        void ToggleValue()
        {
            value = !value;
        }

        // value값이 변경되면 실행됨
        public override void SetValueWithoutNotify(bool newValue)
        {
            base.SetValueWithoutNotify(newValue);
            m_Input.EnableInClassList(inputCheckedUssClassName, newValue);
        }
    }
}
구현

그런 뒤 비쥬얼을 구현하기 위해 Style Sheet를 만들고 토글을 확인할 수 있는 UIDocument를 만든다.
클래스 코드
.slide-toggle__input {
background-color: rgb(85, 76, 113);
max-width: 71px;
border-top-left-radius: 15px;
border-bottom-left-radius: 15px;
border-top-right-radius: 15px;
border-bottom-right-radius: 15px;
overflow: visible;
border-left-width: 0.1px;
border-right-width: 0.1px;
border-top-width: 0.1px;
border-bottom-width: 0.1px;
border-right-color: rgba(0, 0, 0, 0.8);
border-top-color: rgba(0, 0, 0, 0.8);
border-bottom-color: rgba(0, 0, 0, 0.8);
max-height: 30px;
margin-top: 10px;
border-left-color: rgba(0, 0, 0, 0.8);
transition-property: background-color;
transition-duration: 0.5s;
top: 10px;
}
.slide-toggle__input-knob {
height: 33px;
width: 33px;
background-color: rgb(0, 0, 0);
position: absolute;
border-top-left-radius: 25px;
border-bottom-left-radius: 25px;
border-top-right-radius: 25px;
border-bottom-right-radius: 25px;
top: -2px;
transition-property: translate, background-color;
transition-duration: 0.5s, 0.5s;
translate: -1px 0;
border-left-width: 1px;
border-right-width: 1px;
border-top-width: 1px;
border-bottom-width: 1px;
border-left-color: rgba(0, 0, 0, 0);
border-right-color: rgba(0, 0, 0, 0);
border-top-color: rgba(0, 0, 0, 0);
border-bottom-color: rgba(0, 0, 0, 0);
background-image: url('project://database/Assets/GUI%20PRO%20Kit%20-%20Casual%20Game/ResourcesData/Sprite/Demo/Demo_UI/Toggle_Switch_On_Handle.png?fileID=21300000&guid=c426b035919094016adb99e1349aa315&type=3#Toggle_Switch_On_Handle');
-unity-background-scale-mode: scale-and-crop;
}
.slide-toggle__input--checked {
background-color: rgb(246, 168, 20);
}
.slide-toggle__input--checked > .slide-toggle__input-knob {
translate: 37px 0;
}
.slide-toggle:focus .slide-toggle__input-knob {
border-left-width: 1px;
border-right-width: 1px;
border-top-width: 1px;
border-bottom-width: 1px;
border-left-color: var(--unity-colors-input_field-border-focus);
border-right-color: var(--unity-colors-input_field-border-focus);
border-top-color: var(--unity-colors-input_field-border-focus);
border-bottom-color: var(--unity-colors-input_field-border-focus);
}
Class효과
각 클래스별 효과 입니다.
slide-toggle__input

슬라이드 토글에서 바탕이 되는부분의 기본적인 모습을 정의해준 클래스 입니다.
slide-toggle__input-knob

슬라이드 토글에서 동그란 손잡이 역할을 하는부분의 비쥬얼을 담당하는 클래스 입니다.
slide-toggle__input--checked
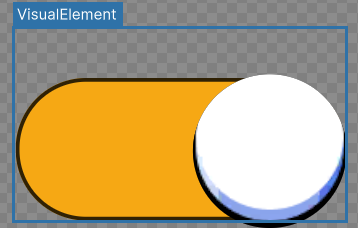
토글의 value값이 바뀌면 스크립트에서 코드로 추가해서 작동하는 클래스이다. 배경색을 변경시킨다.
slide-toggle__input--checked > .slide-toggle__input-knob
slide-toggle__input--checked 클래스가 있다면 slide-toggle__input-knob의 값을 변경시켜주는 클래스이다. 손잡이의 위치를 변경시켜주는 역할을 한다.
slide-toggle:focus .slide-toggle__input-knob
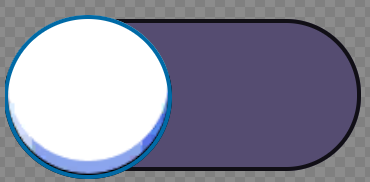
현재 UI가 선택되었을때 실행 된다. 핸들의 외각선을 파란색으로 변경해주는 역할을 한다.
결과
이제 아까 만들었던 UIDocument를 실행하고 아까 만들었던 Style Sheet를 추가해준 뒤 Project > Custom Controls > MyUILibrary에 있는 SliderTogle을 가져온다.

이러면 잘 작동하는걸 확인할 수 있다.
'프로그래밍 > UNITY' 카테고리의 다른 글
| [Unity] Timeline (0) | 2023.08.05 |
|---|---|
| [Unity] Vector에 대하여 (0) | 2023.04.28 |
| [Unity] State Machine을 이용한 FSM (4) | 2023.04.18 |
| [Unity] Mathf 클래스 (0) | 2023.03.28 |
| [Unity] 유니티 애니매이션 블렌드 트리 (0) | 2023.03.11 |
